
What Causes Epoxy Floor Bubbles? 7 Common Reasons
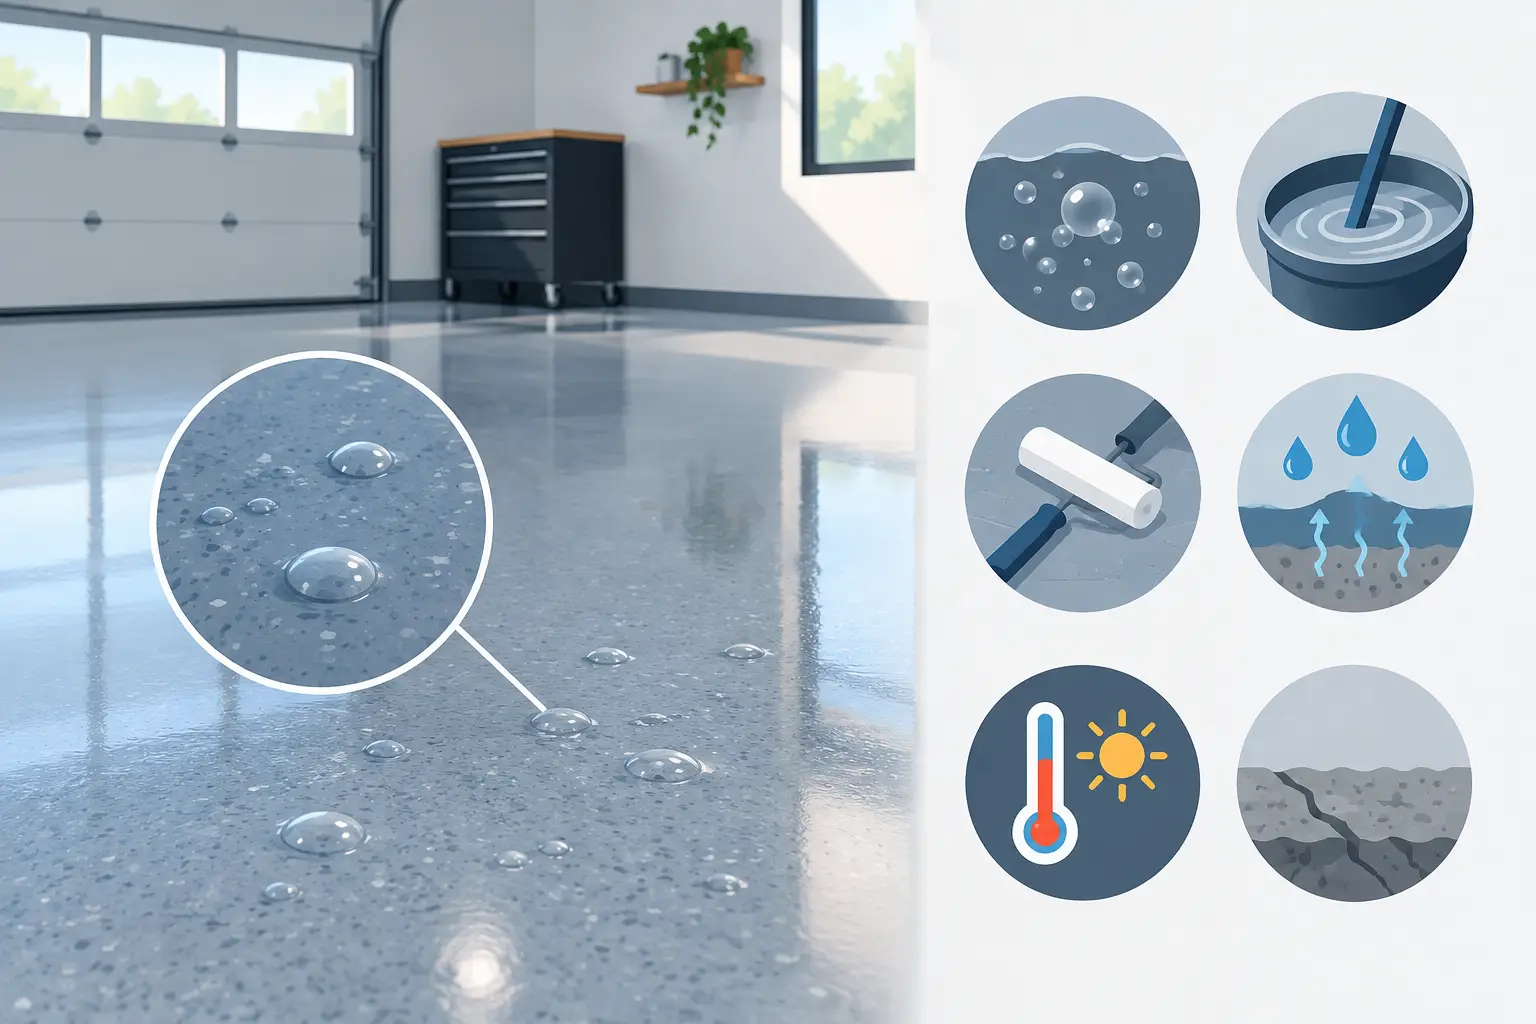
A new epoxy floor should cure into a smooth, dense surface that is easy to clean and built to handle traffic, chemicals, and daily wear. When bubbles, blisters, or small craters appear instead, the coating is telling you something went wrong below or during application. Understanding what causes epoxy floor bubbles is the first step toward avoiding a coating failure that can spread, peel, or require costly repairs.
Most bubbling problems are not caused by the epoxy product alone. They are usually tied to concrete moisture, incomplete surface preparation, incorrect mixing, or application conditions that were not controlled. The right repair depends on the cause, which is why an experienced flooring contractor starts by evaluating the concrete rather than simply rolling on another coat.
What Causes Epoxy Floor Bubbles During Installation?
Epoxy bonds to concrete mechanically and chemically. For that bond to hold, the slab needs to be clean, dry enough for the specified system, properly profiled, and free of pressure pushing up from below. If air, water vapor, oil, or contaminants interfere with that process, bubbles can form while the coating is still wet or appear later as blisters.
Small pinholes are not always the same as large raised bubbles. Pinholes often point to air escaping from the concrete. Larger blisters may indicate moisture vapor pressure or a bond problem. A qualified inspection distinguishes between these issues before recommending a repair.
1. Moisture Vapor Moving Through the Concrete
Concrete may look dry on the surface while still holding moisture below. Water vapor naturally moves through slabs, especially in garages, ground-level buildings, warehouses, and older structures without an effective vapor barrier. When vapor reaches an epoxy coating, it can become trapped and create pressure beneath the finish.
That pressure can produce round blisters, bubbles, or areas where the epoxy eventually releases from the concrete. In Orange County, moisture issues can still occur despite the generally dry climate. Slabs exposed to rain, irrigation runoff, coastal humidity, plumbing leaks, or moisture from below grade can all present problems.
The risk is higher when epoxy is installed over a newly poured slab that has not cured sufficiently, a slab that was recently washed, or concrete with an unknown moisture history. A professional moisture test helps determine whether the floor needs a moisture-mitigation primer or a different coating approach before installation.
2. Concrete Outgassing
Concrete is porous. Its small voids contain air, and that air can move upward as temperatures rise or as the slab warms in direct sunlight. This process is called outgassing. If epoxy is applied while the concrete is releasing air, tiny bubbles can rise into the wet coating and leave pinholes or crater-like defects.
Garage floors are common trouble spots because the slab may be cool in the morning and heat quickly later in the day. Sunlight entering through an open garage door can also warm one area faster than another. On commercial projects, equipment, overhead doors, and changing building temperatures can have a similar effect.
Proper scheduling matters. Experienced installers monitor slab temperature, ambient temperature, and humidity, then apply the system during conditions that reduce outgassing. A suitable primer coat can also help fill the concrete’s pores and limit air movement before the build coat is installed.
3. Inadequate Surface Preparation
Epoxy is only as reliable as the concrete it is attached to. Paint, sealers, curing compounds, dust, drywall residue, grease, oil, tire dressing, and old adhesive can prevent the epoxy from bonding evenly. A coating may initially look acceptable, then develop blisters or peeling areas as traffic and temperature changes expose the weak bond.
Acid etching alone is often not enough for demanding garage, retail, industrial, or warehouse floors. Mechanical diamond grinding is typically the more dependable preparation method because it removes surface contamination and creates the proper concrete surface profile for the coating system.
Preparation also includes detailed edge work, crack repair, joint evaluation, and thorough vacuuming. Skipping these steps to save time can leave behind weak areas that show up later as bubbles, delamination, or rough patches in the finished floor.
4. Applying Epoxy Over Oil or Chemical Contamination
A garage slab can hold years of motor oil, brake fluid, fuel, solvents, and tire residue. In commercial spaces, contamination may come from food oils, cleaning chemicals, forklifts, manufacturing fluids, or old maintenance products. These materials can penetrate deeper than the visible stain.
If contaminants are not removed or mechanically opened up during preparation, epoxy may bridge over the problem rather than bond to sound concrete. That can lead to localized bubbling or peeling, especially in the areas that receive the most vehicle traffic.
Some slabs can be restored with aggressive grinding and targeted treatment. Others may need a more involved remediation plan. The right answer depends on how deeply the contamination has penetrated and what the floor will be used for after coating.
5. Incorrect Mixing or Mixing Too Much Material at Once
Two-component epoxy relies on an exact resin-to-hardener ratio. If the components are not measured correctly or mixed thoroughly, portions of the floor may not cure as designed. The coating can remain soft, develop an uneven sheen, trap air, or lose adhesion.
Mixing technique matters as well. Fast, aggressive mixing can whip air into the material. Using a drill at the wrong speed, failing to scrape the sides and bottom of the container, or not allowing the required induction time can all affect the final finish.
Epoxy also has a limited working time once mixed. A large batch can heat up quickly in the bucket, reducing pot life and making it harder to spread smoothly. Professional crews mix manageable quantities, follow manufacturer specifications, and maintain a consistent installation pace across the floor.
6. Coating Is Applied Too Thick or Outside the Right Conditions
Applying too much epoxy in one pass can trap solvents or air as the material cures. It may look glossy at first, then develop bubbles, wrinkles, or soft spots. Thick-build systems can perform extremely well, but they need to be installed at the proper coverage rate and in the correct sequence.
Temperature and humidity also affect cure time and flow. Cold conditions can slow curing and make epoxy too thick to release air properly. Excessive heat can shorten working time. High humidity may create surface defects in certain systems, while a slab temperature close to the dew point can lead to moisture-related bond issues.
This is one reason flooring installation is more than choosing a color and opening a kit. The product, slab condition, application thickness, and jobsite environment must work together.
7. Recoating Too Soon or Skipping Intercoat Preparation
Multi-coat epoxy systems need proper timing between coats. If a new layer is installed before the prior coat reaches the required cure stage, trapped solvents or incomplete curing can contribute to defects. If the recoat window is missed and the surface is not properly sanded or screened, the next layer may not bond correctly.
Broadcast flake systems, metallic epoxy finishes, and high-build commercial coatings each have their own installation requirements. The system should be selected based on the floor’s intended use, not just its appearance. A residential garage needs a different approach than a restaurant kitchen, airplane hangar, or chemical-exposed work area.
Can Epoxy Floor Bubbles Be Repaired?
Sometimes, yes. A few shallow pinholes or isolated bubbles may be repaired by sanding or grinding the affected section, removing loose material, addressing the underlying issue, and recoating the area. The repair must blend with the surrounding finish and match the original system’s performance requirements.
Widespread blistering is more serious. If moisture pressure or poor adhesion is affecting large portions of the slab, spot repairs may only delay another failure. The affected coating may need to be removed by diamond grinding before the concrete is tested, repaired, and recoated with the right primer or moisture-control system.
The key is not to paint over bubbles. Covering the defect without fixing the cause can trap more moisture or air and make removal harder later.
Preventing Bubbles Starts Before the Epoxy Goes Down
A lasting epoxy floor begins with a site-specific plan. The concrete should be evaluated for moisture, contamination, cracks, previous coatings, and surface hardness. Then it should be mechanically prepared, thoroughly cleaned, and coated under conditions that support proper curing.
For homeowners, that means a garage floor that stays attractive and easier to maintain. For facility managers and business owners, it means less downtime, fewer coating repairs, and a finish built around actual traffic, chemical exposure, and cleaning needs.
If your epoxy floor is bubbling or you are planning a new installation, get the slab evaluated before choosing a repair. Orange County Concrete Polishing provides in-person assessments and customized coating recommendations so the system is built to perform where it matters most: on your concrete.
Recent Post

Overnight Floor Installation Planning That Works September 20, 2026 1:51 am
Top Commercial Floor Coating Options for Business September 18, 2026 1:53 am
How to Clean Polished Concrete Without Dulling It September 14, 2026 1:52 am